
The quest for convenient, kid-friendly, and satisfying breakfast options often leads parents to explore the world of pre-packaged snacks. Among these, Smucker’s Uncrustables have carved out a significant niche, offering sealed sandwiches that are both portable and appealing to younger palates. However, a growing movement towards healthier eating and a desire for greater control over ingredients have spurred interest in homemade alternatives. This article delves into the creation of superior homemade chocolate uncrustables, focusing on ingredient selection, essential tools, and practical tips for achieving a perfect result that rivals, and often surpasses, its commercially produced counterpart. The shift towards homemade versions is not merely about taste; it represents a conscious effort to reduce sugar intake and offer more wholesome options for daily consumption, particularly for breakfast.
The Appeal of the Homemade Uncrustable
The fundamental appeal of the uncrustable format lies in its ingenious design: a perfectly sealed sandwich where the filling is contained, eliminating the messy drips and sticky fingers often associated with traditional sandwiches. This containment feature makes them ideal for busy mornings, school lunches, or on-the-go snacks. The introduction of a specialized uncrustable maker amplifies this convenience, transforming ordinary bread and fillings into perfectly shaped, sealed treats. This transformation goes beyond mere aesthetics; it turns a simple sandwich into a fun, engaging food item that children, in particular, find appealing. The ability to customize fillings also opens up a world of possibilities, moving beyond the standard peanut butter and jelly to more adventurous and nutritious combinations.

Elevating the Chocolate Filling: Beyond Nutella
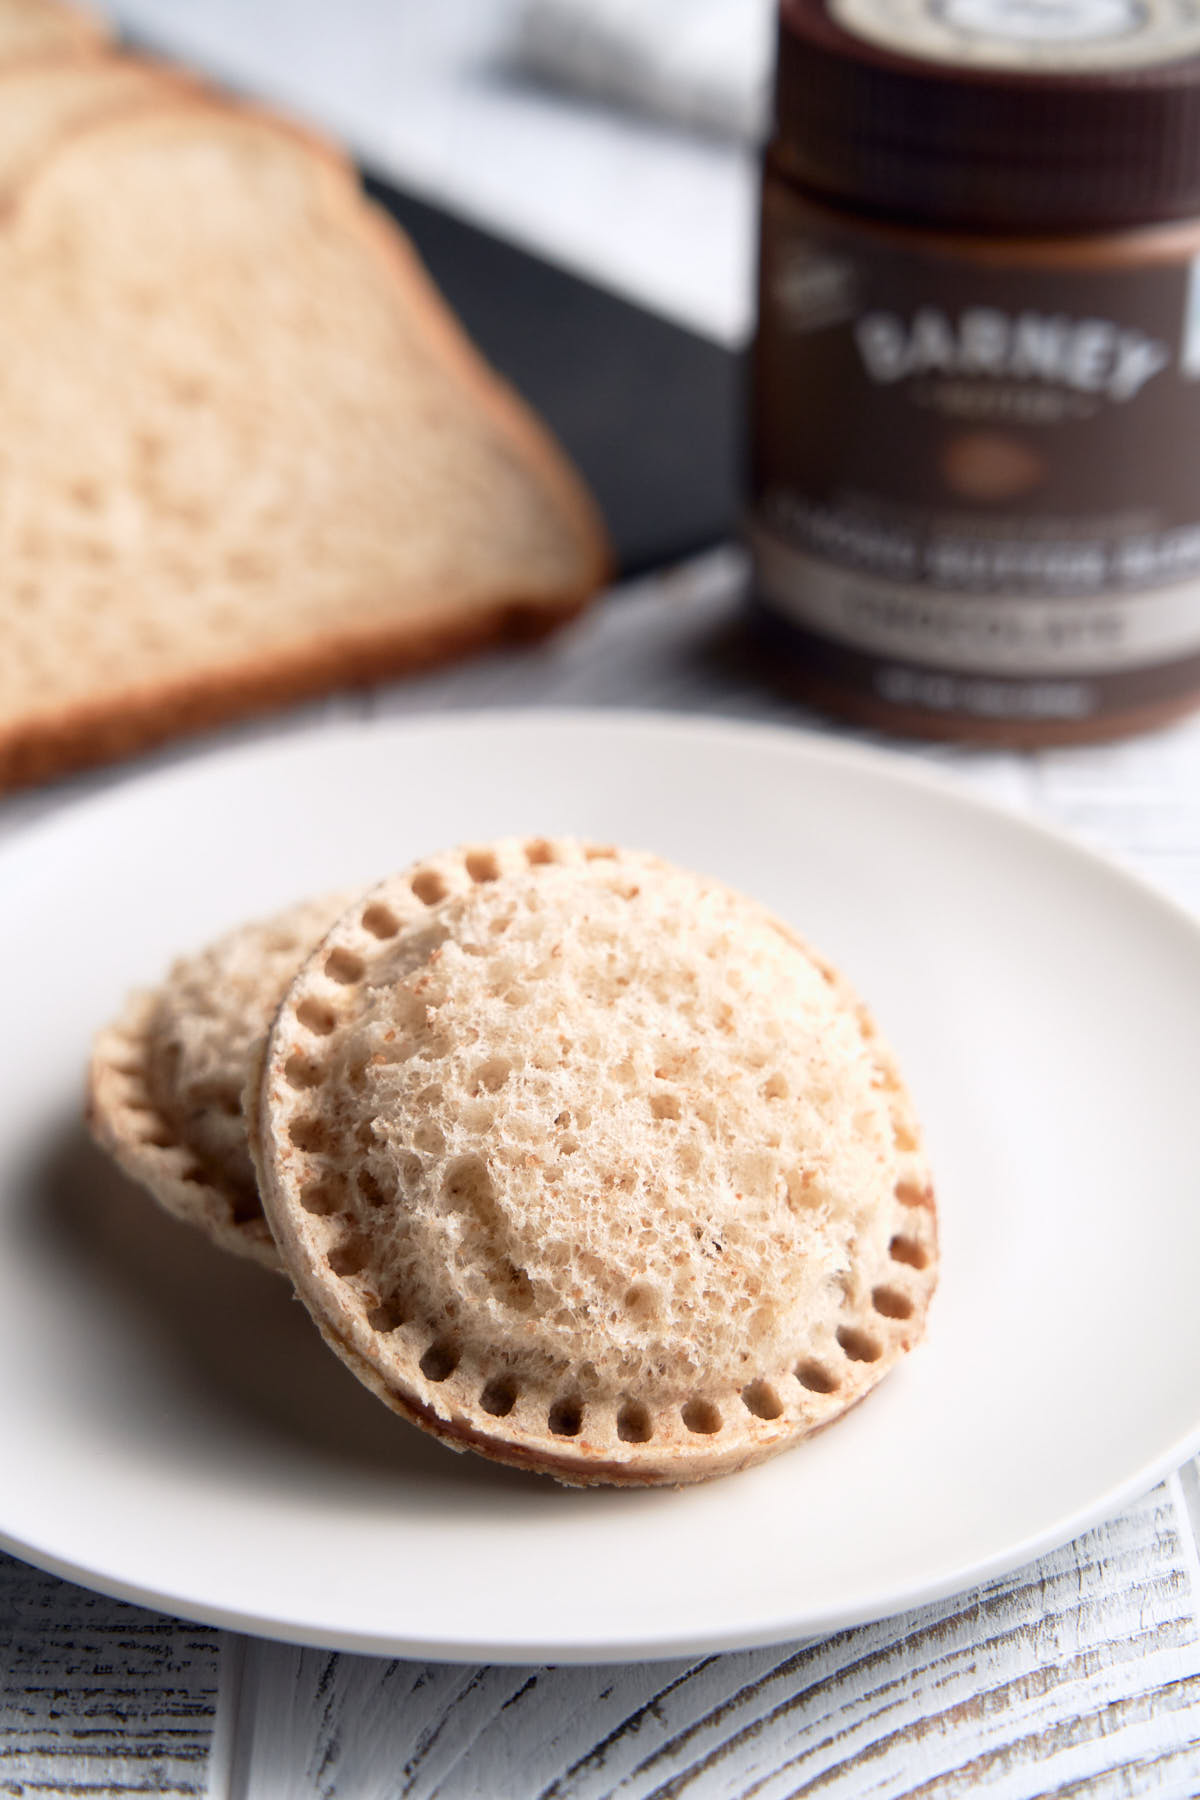
A cornerstone of any exceptional chocolate uncrustable is the quality of the chocolate spread used. While many commercially available uncrustables utilize a chocolate hazelnut spread, the pursuit of a healthier and potentially more flavorful alternative has led to the discovery of innovative products. For instance, Barney Butter’s Almond Butter with Chocolate emerges as a standout option. This spread offers a smooth texture and a balanced sweetness, providing a sophisticated chocolate flavor profile.
Crucially, the nutritional advantages of such alternatives are significant. Compared to traditional chocolate hazelnut spreads, which can contain upwards of 21 grams of added sugar per serving, options like Barney Butter’s chocolate almond butter often boast a much lower sugar content, typically around 2 grams of added sugar per serving. This substantial difference makes it a far more responsible choice for a daily breakfast item, aligning with contemporary health recommendations that emphasize limiting added sugars in children’s diets. The ease of spreading and the rich, satisfying flavor contribute to its suitability for creating homemade uncrustables that are both delicious and health-conscious. This focus on ingredient quality underscores a broader trend in home cooking: prioritizing nutrient density and minimizing processed ingredients.
The Essential Tool: Mastering the Uncrustable Maker
To replicate the signature look and seal of a store-bought uncrustable, a specialized sandwich cutter and sealer is indispensable. The market offers a variety of such tools, but selecting the right one can significantly impact the final product. Many users recommend tools that produce a clean, classic circular edge, similar to the original Smucker’s design. Some less effective models may result in wavy or uneven edges, which can be unappealing, especially to discerning young eaters.

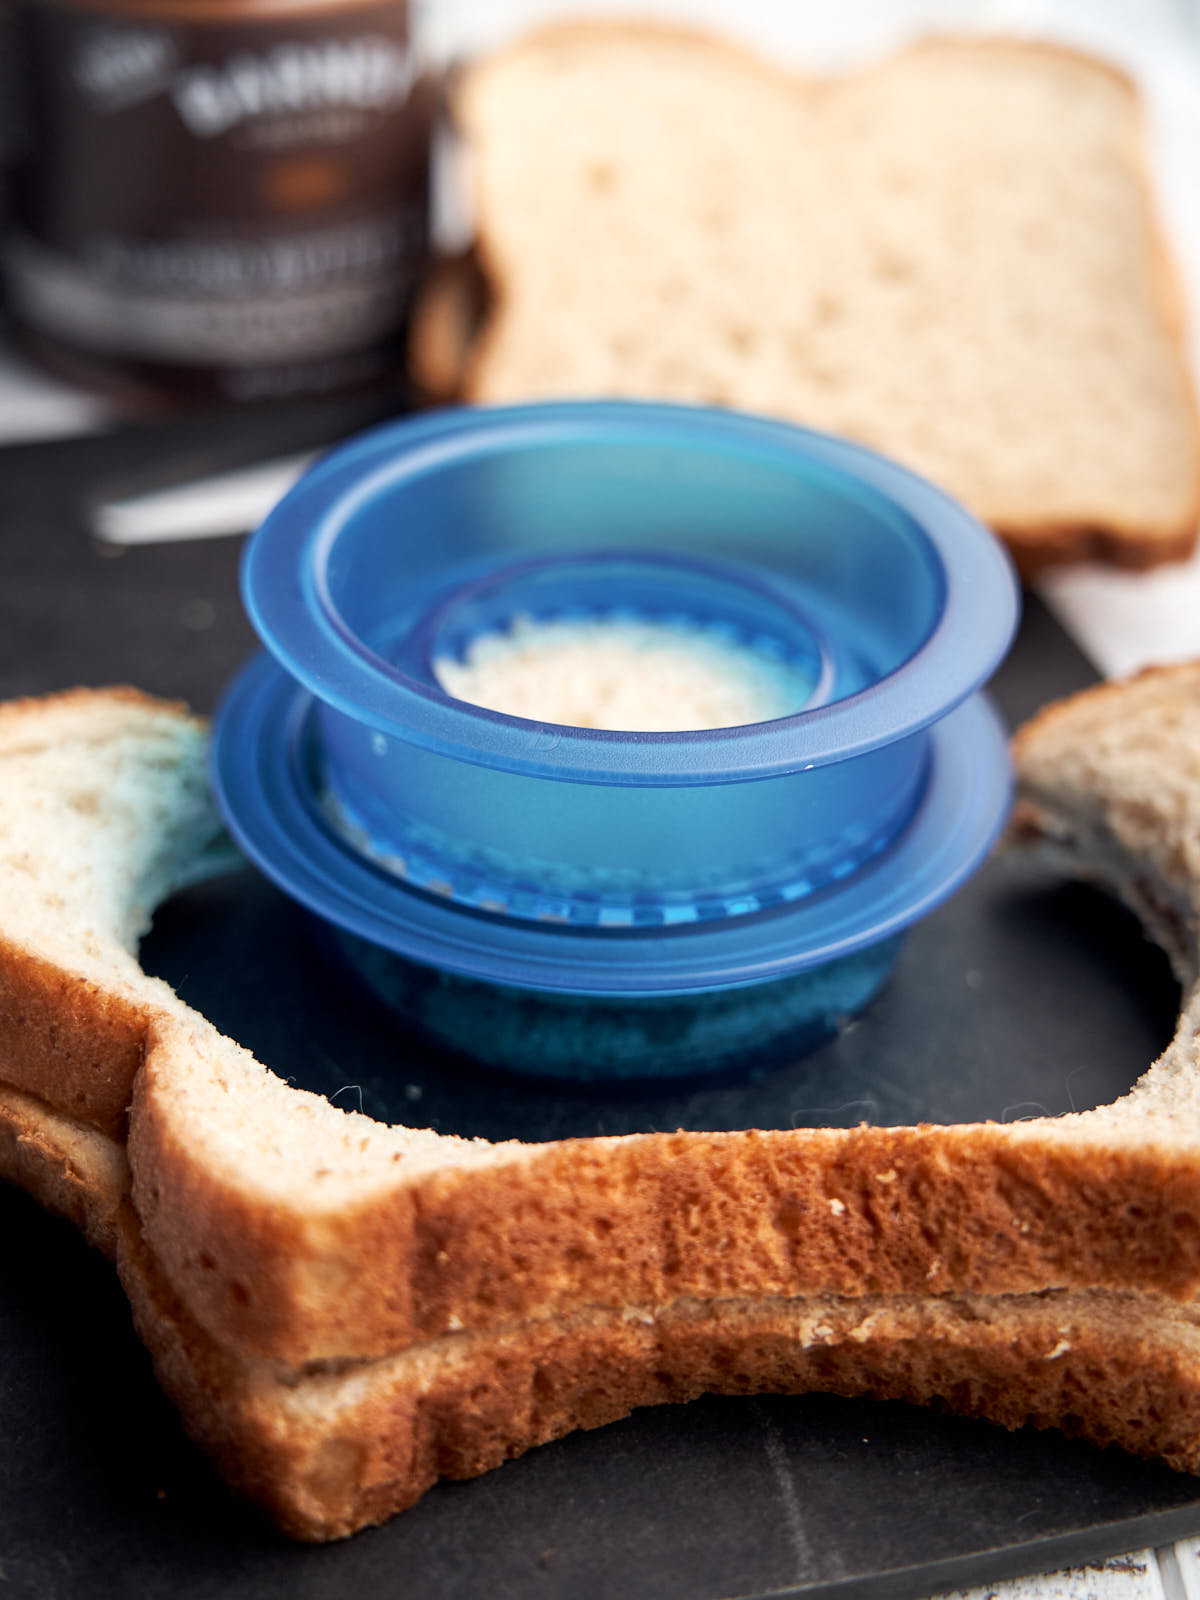
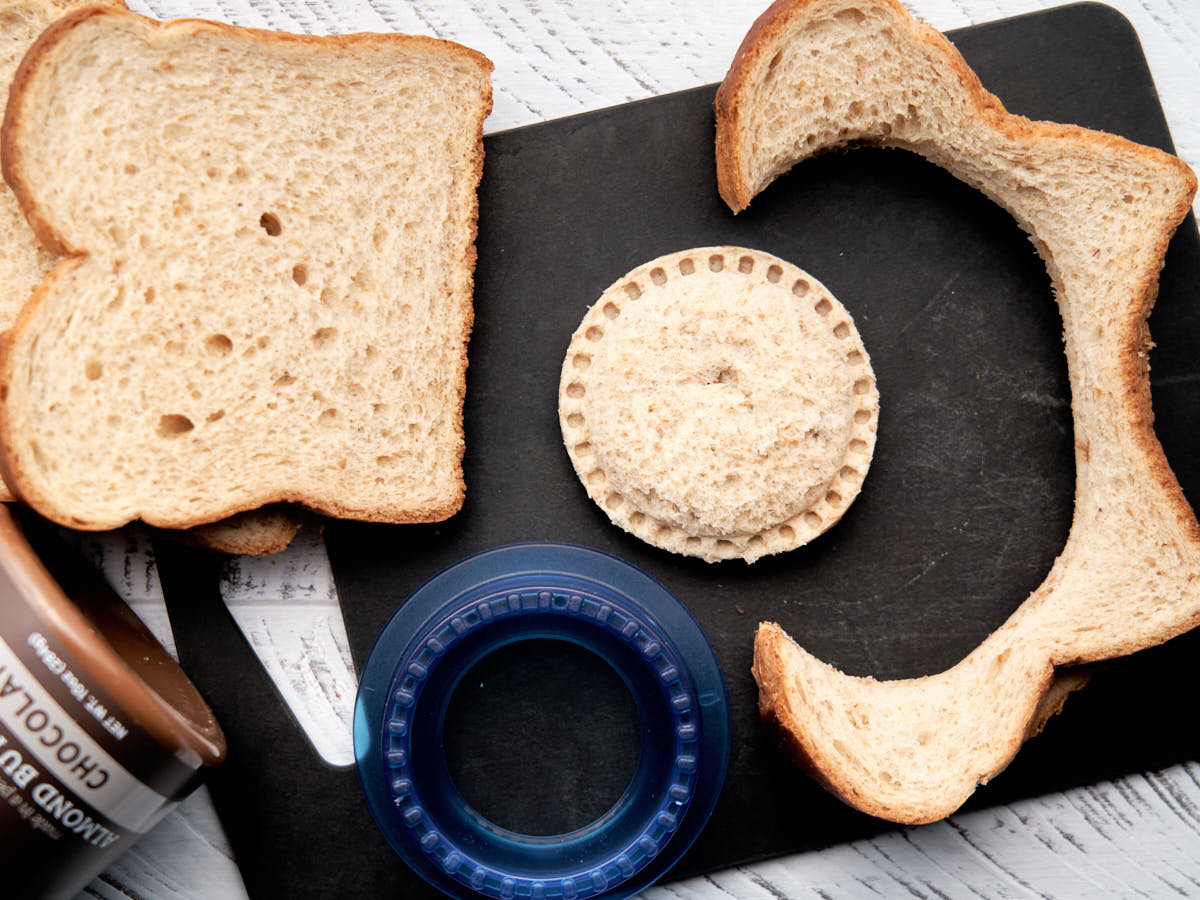
The recommended approach often involves a two-step process using these makers. The first step typically involves a circular cutter to remove the bread crusts, creating a uniform base. The second step utilizes a sealing mechanism to crimp the edges of the bread together, effectively locking in the filling. This simple yet effective mechanism ensures that the filling remains contained, even during vigorous consumption or playful handling by children. The precision of these tools is key to achieving a professional-looking and perfectly functional uncrustable.
Crafting the Perfect Homemade Chocolate Uncrustable: Key Tips
The process of making homemade uncrustables, while straightforward, benefits from a few key considerations to ensure optimal results.
The Importance of Soft Bread
The choice of bread plays a critical role in the success of homemade uncrustables. Soft, pliable sandwich breads are ideal because they are less prone to splitting or cracking when subjected to the cutting and sealing process. Varieties like Wonder Bread or Nature’s Own Honey Wheat are often cited as excellent choices. These breads have a fine crumb structure that can withstand the pressure of the uncrustable maker without compromising the integrity of the sandwich. Conversely, whole wheat breads, with their denser texture and coarser crumb, may not hold up as well, potentially leading to cracked edges and a less appealing final product. The flexibility of soft bread ensures a smooth, sealed edge every time.
Moderation in Filling Application
A common pitfall in creating homemade uncrustables is the tendency to overfill. Even with a perfectly sealed edge, an excessive amount of filling can ooze out, compromising the neatness of the final product. It is crucial to apply a moderate amount of the chocolate spread. A visual cue to avoid is spreading the filling all the way to the edges of the bread. Instead, concentrate the spread in the center of the sandwich. This strategy prevents the filling from being squeezed out during the sealing process, ensuring a clean, well-contained uncrustable. Observing the visual cues in accompanying imagery, such as a slight overflow onto the sealed edge, can serve as a helpful reminder to exercise restraint with the filling.
Strategic Filling Placement
Complementing the tip on moderation, strategic placement of the filling is paramount. By keeping the chocolate spread confined to the central area of the bread, the likelihood of spillage is significantly reduced. This focused application allows the uncrustable maker to effectively seal the bread without encountering resistance from the filling. This technique, when combined with a soft bread and appropriate filling quantity, guarantees a clean and satisfying chocolate uncrustable.
Nutritional Context and Broader Implications
The rise of homemade uncrustables, particularly healthier chocolate versions, reflects a broader societal trend towards greater awareness of dietary choices. Concerns about childhood obesity and the long-term health effects of excessive sugar consumption have prompted parents to seek out more nutritious alternatives to pre-packaged snacks. According to the World Health Organization, reducing intake of free sugars is a key recommendation for all age groups, with particular emphasis on children. By opting for spreads with lower sugar content and using whole grain or enriched breads, parents can significantly enhance the nutritional profile of this popular snack.
The ability to control ingredients also extends to accommodating dietary restrictions. For families dealing with allergies or intolerances, making uncrustables at home allows for the use of allergen-free breads and alternative spreads, such as seed butters or other nut-free options. This inclusivity further solidifies the homemade approach as a superior choice for diverse dietary needs.
A Step-by-Step Guide to Homemade Chocolate Uncrustables
Ingredients:
- 2 slices of soft sandwich bread (e.g., white, honey wheat)
- Chocolate spread of choice (e.g., Barney Butter Almond Butter with Chocolate, or other lower-sugar alternatives)
Equipment:
- Uncrustable sandwich cutter and sealer tool
Instructions:
- Prepare the Bread: Lay out two slices of soft sandwich bread on a clean, flat surface.
- Apply the Filling: Using a knife or spatula, spread a moderate amount of your chosen chocolate spread onto the center of one slice of bread. Ensure the spread does not extend to the very edges.
- Assemble the Sandwich: Place the second slice of bread on top of the spread-covered slice, creating a standard sandwich.
- Cut and Seal: Position the uncrustable sandwich cutter and sealer tool over the assembled sandwich. Press down firmly to simultaneously cut off the crusts and seal the edges of the sandwich.
- Remove and Serve: Carefully remove the sealed uncrustable from the cutter. Repeat the process for any remaining sandwiches.
Conclusion: Empowering Healthier Choices
The homemade chocolate uncrustable represents more than just a culinary endeavor; it is a practical solution for parents seeking to provide their children with a delicious, convenient, and healthier alternative to store-bought snacks. By carefully selecting ingredients, utilizing the right tools, and employing simple yet effective techniques, families can recreate this beloved treat with enhanced nutritional value and personalized flavor. The shift towards homemade options empowers consumers to make informed dietary choices, contributing to overall well-being and fostering a positive relationship with food from an early age. The accessibility of specialized tools and the growing availability of healthier spread options make this a truly achievable and rewarding undertaking for any home cook.
