The universally beloved soft pretzel, a comforting and craveable snack, is far more accessible for home bakers than many realize. While often associated with bustling mall food courts and iconic chain bakeries, a closer examination of this simple dough reveals a surprisingly straightforward path to achieving a superior, homemade version. The key lies in understanding the fundamental principles of dough hydration, yeast activation, and the transformative power of a precise alkaline bath, culminating in a chewy, buttery, and perfectly salted treat that rivals, and arguably surpasses, its commercial counterparts. This exploration delves into the intricacies of creating these delightful baked goods, offering insights into the science behind their texture and flavor, and providing a comprehensive guide for aspiring pretzel artisans.
The Genesis of the Pretzel Craving
The allure of the soft pretzel is deeply rooted in sensory experience. The golden-brown, slightly crisp exterior gives way to a pillowy, tender interior, punctuated by bursts of coarse salt. Its aroma, a warm embrace of baked dough and subtle yeast notes, is instantly recognizable and undeniably comforting. For many, the pretzel evokes nostalgic memories of childhood outings, quick mall trips, or late-night cravings satisfied. The comparison to established brands like Auntie Anne’s, often considered the benchmark, highlights the desire for that specific texture and taste. This article aims to demystify the process, empowering home cooks to replicate and even elevate this cherished snack.

Unpacking the Core Ingredients and Their Roles
At its heart, the soft pretzel is a testament to the simplicity of its core components:
- Flour: All-purpose flour is the standard, providing the necessary gluten structure. While some bakers advocate for bread flour for a chewier result, the author’s extensive testing indicates that the baking soda bath plays a more critical role in achieving that desired texture.
- Yeast: Active dry yeast is crucial for leavening. The initial step of blooming the yeast in warm water with sugar ensures its viability, a vital indicator that the fermentation process will commence effectively.
- Water: Warm water activates the yeast and hydrates the flour, forming the dough. The precise temperature is critical; too hot will kill the yeast, too cold will slow its activity.
- Sugar: A small amount of sugar feeds the yeast, accelerating its activity and contributing to browning during baking.
- Butter: Melted butter enriches the dough, adding a subtle richness and contributing to the tender crumb.
- Salt: Essential for flavor, salt also controls yeast activity and strengthens gluten development.
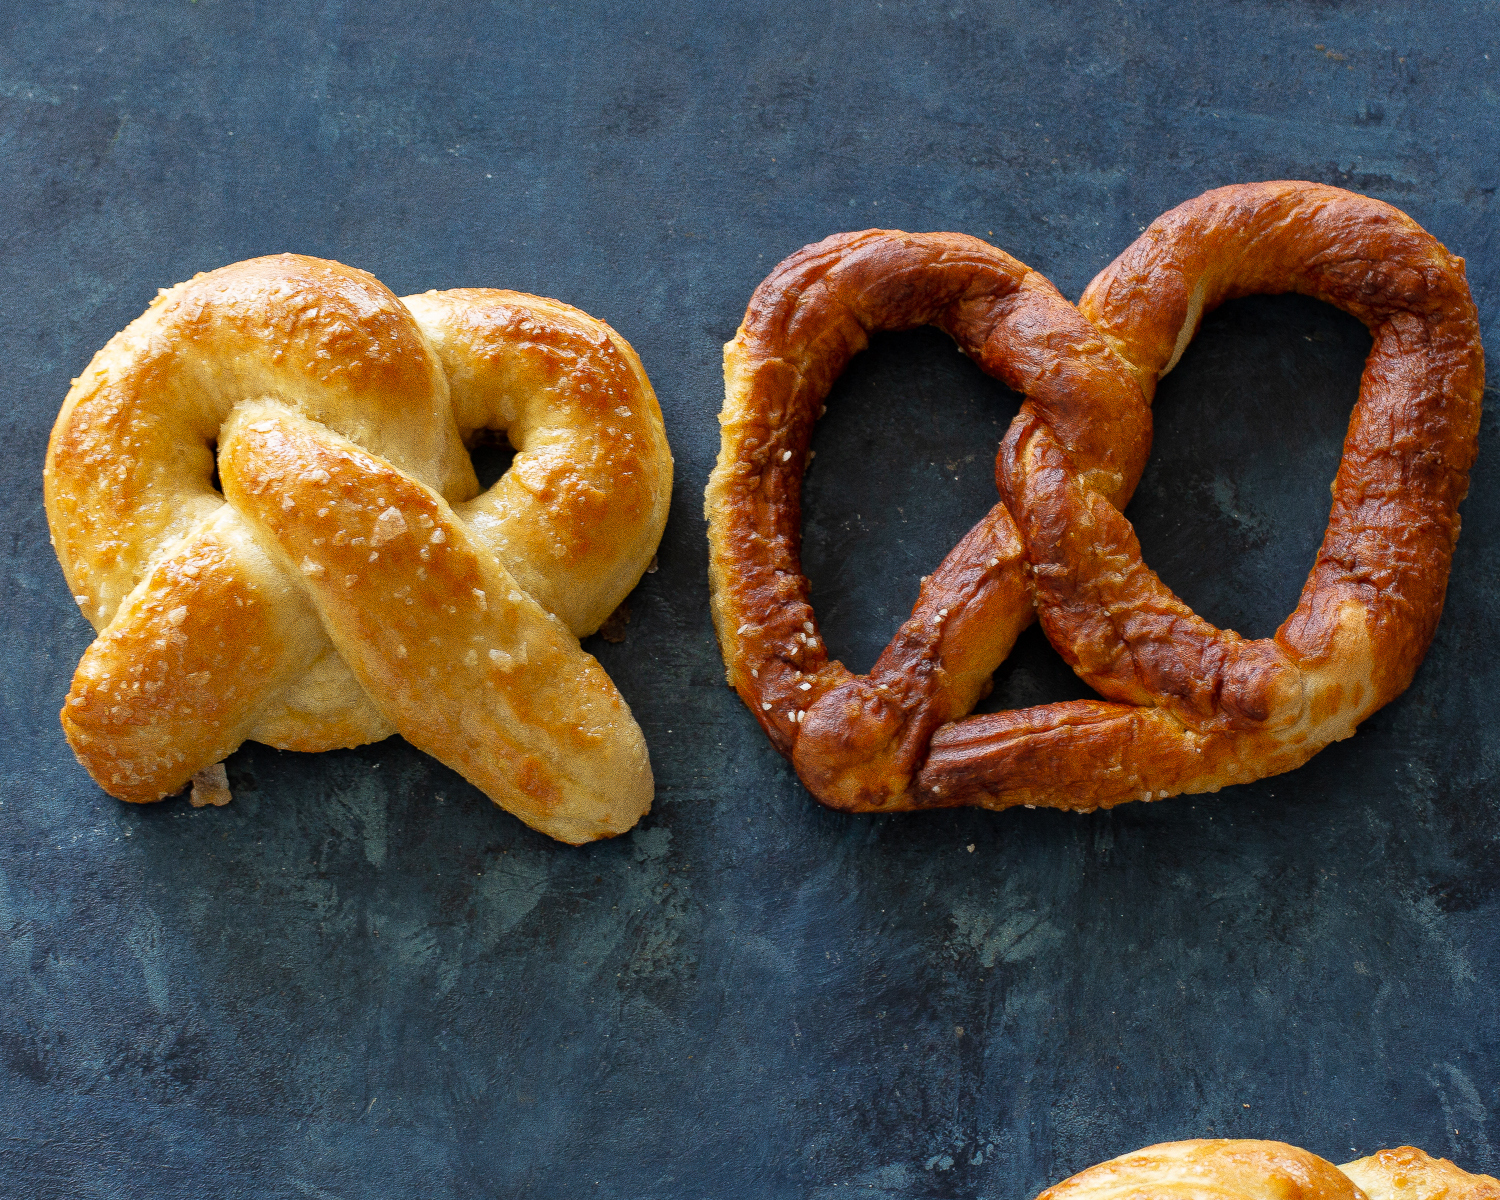
- Baking Soda: This is arguably the most critical ingredient for achieving the characteristic pretzel texture. When dissolved in water to create an alkaline bath, it reacts with the starches on the pretzel’s surface during the brief submersion, creating a gelatinized layer that results in the signature chewiness and a deeper brown color during baking.
- Egg Wash: A simple egg wash, often a mixture of egg and water, provides a glossy sheen and helps the coarse salt adhere to the pretzel’s surface.
The Science of the Chew: The Baking Soda Bath Explained
The transformative power of the baking soda bath is not merely a culinary tradition; it’s a chemical reaction. When the pretzel dough is briefly submerged in a hot baking soda solution (typically a ratio of about 1/4 cup baking soda to 4 cups of water), the alkaline environment causes the starches on the surface of the dough to undergo a process called gelatinization. This process, akin to cooking the surface of the dough before baking, creates a distinct texture. The submersion time is critical: too short and the effect is minimal; too long and the pretzel can develop an unpleasant soapy flavor or a too-hard crust. The recommended 15-30 seconds strikes the perfect balance, contributing significantly to the pretzel’s signature chewy interior and slightly crisped exterior. This technique is what truly differentiates a homemade soft pretzel from a standard bread roll.

A Step-by-Step Journey to Pretzel Perfection
The creation of homemade soft pretzels is an engaging process that can be broken down into manageable steps:
Step 1: Activating the Yeast and Mixing the Dough
The journey begins by combining warm water, active dry yeast, and a pinch of sugar in a bowl. Allowing this mixture to sit for about 5-10 minutes until it becomes foamy is a crucial confirmation that the yeast is alive and ready to work its magic. This "blooming" process is the first sign of successful dough development. Once the yeast is active, melted butter, salt, and flour are added. The dough is then kneaded until it is smooth and elastic. This can be achieved by hand, which provides a satisfying, albeit more labor-intensive, workout, or by using a stand mixer with a dough hook. The goal is a dough that pulls away cleanly from the sides of the bowl without being overly sticky. Adding too much flour can result in a dry, bready pretzel, while too little will make the dough unmanageable.
Step 2: The Crucial Rise
After kneading, the dough is placed in a lightly oiled bowl, covered, and allowed to rise. The author emphasizes that this rise should be for a relatively short period, approximately 30-45 minutes, and not until the dough has doubled in size. Over-proofing can lead to a less desirable, more bready texture, as the yeast consumes too much of the available sugars and the gluten structure becomes too relaxed. The goal is a dough that has increased in volume but retains a good amount of its structure, ready to be shaped.
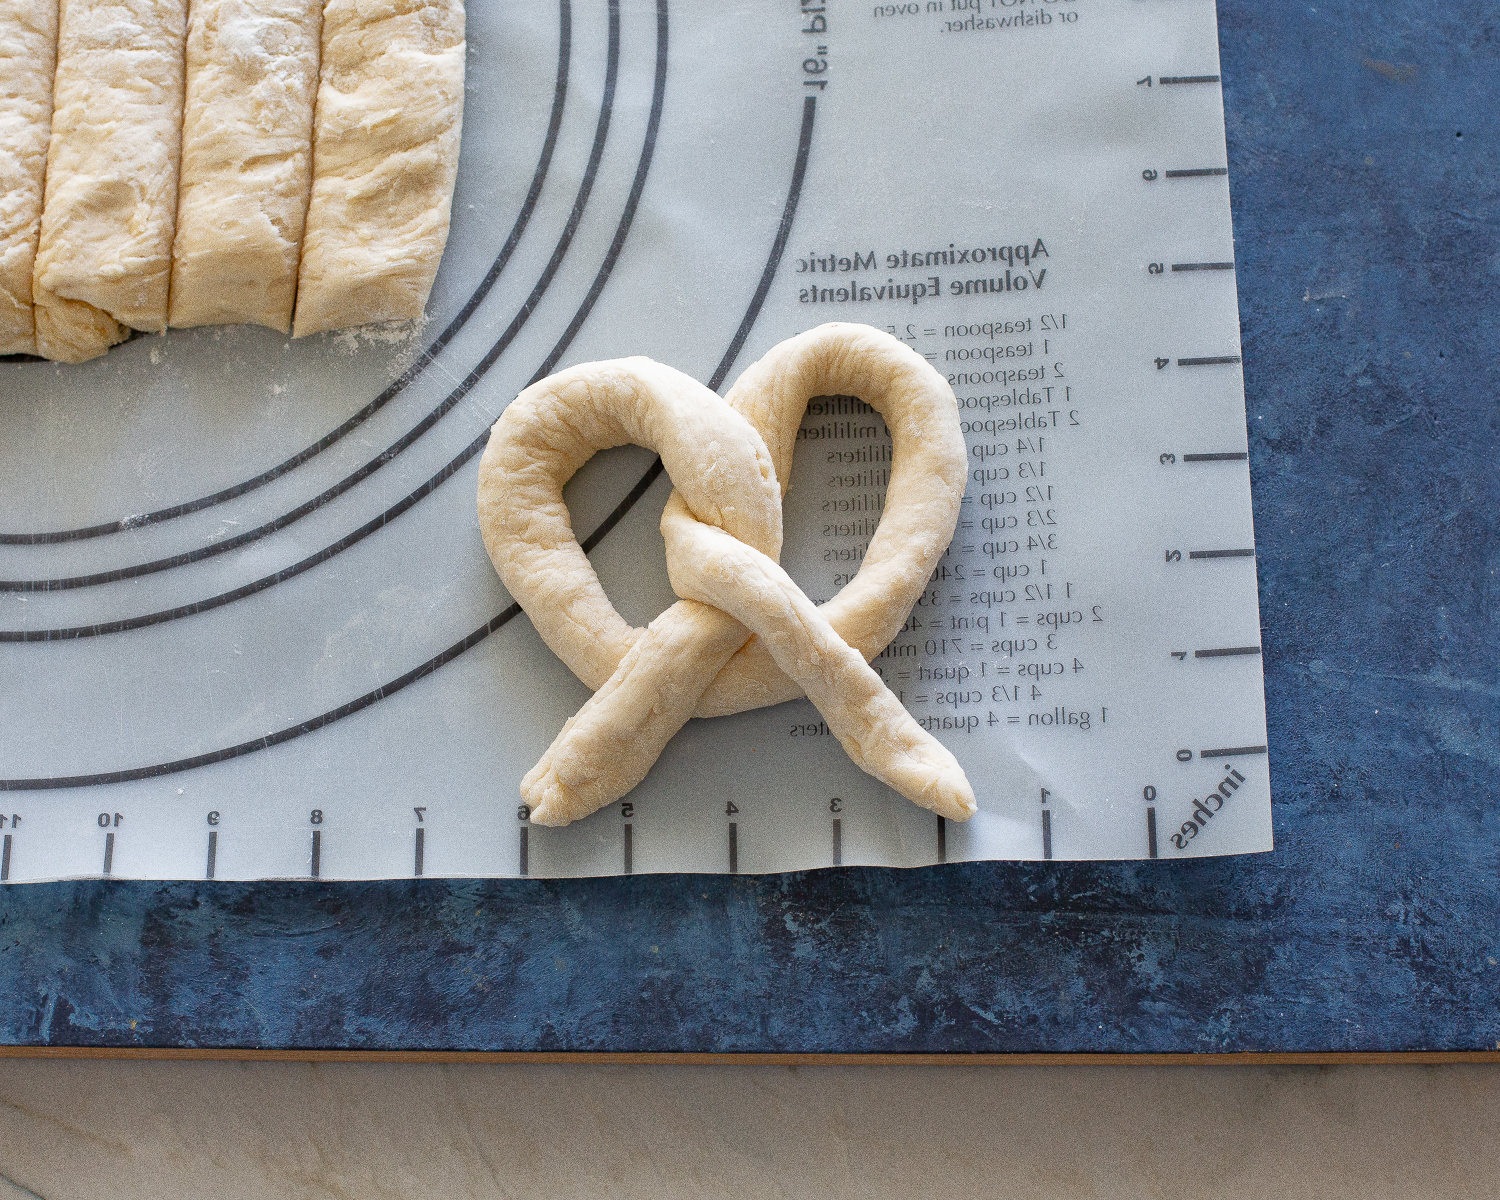
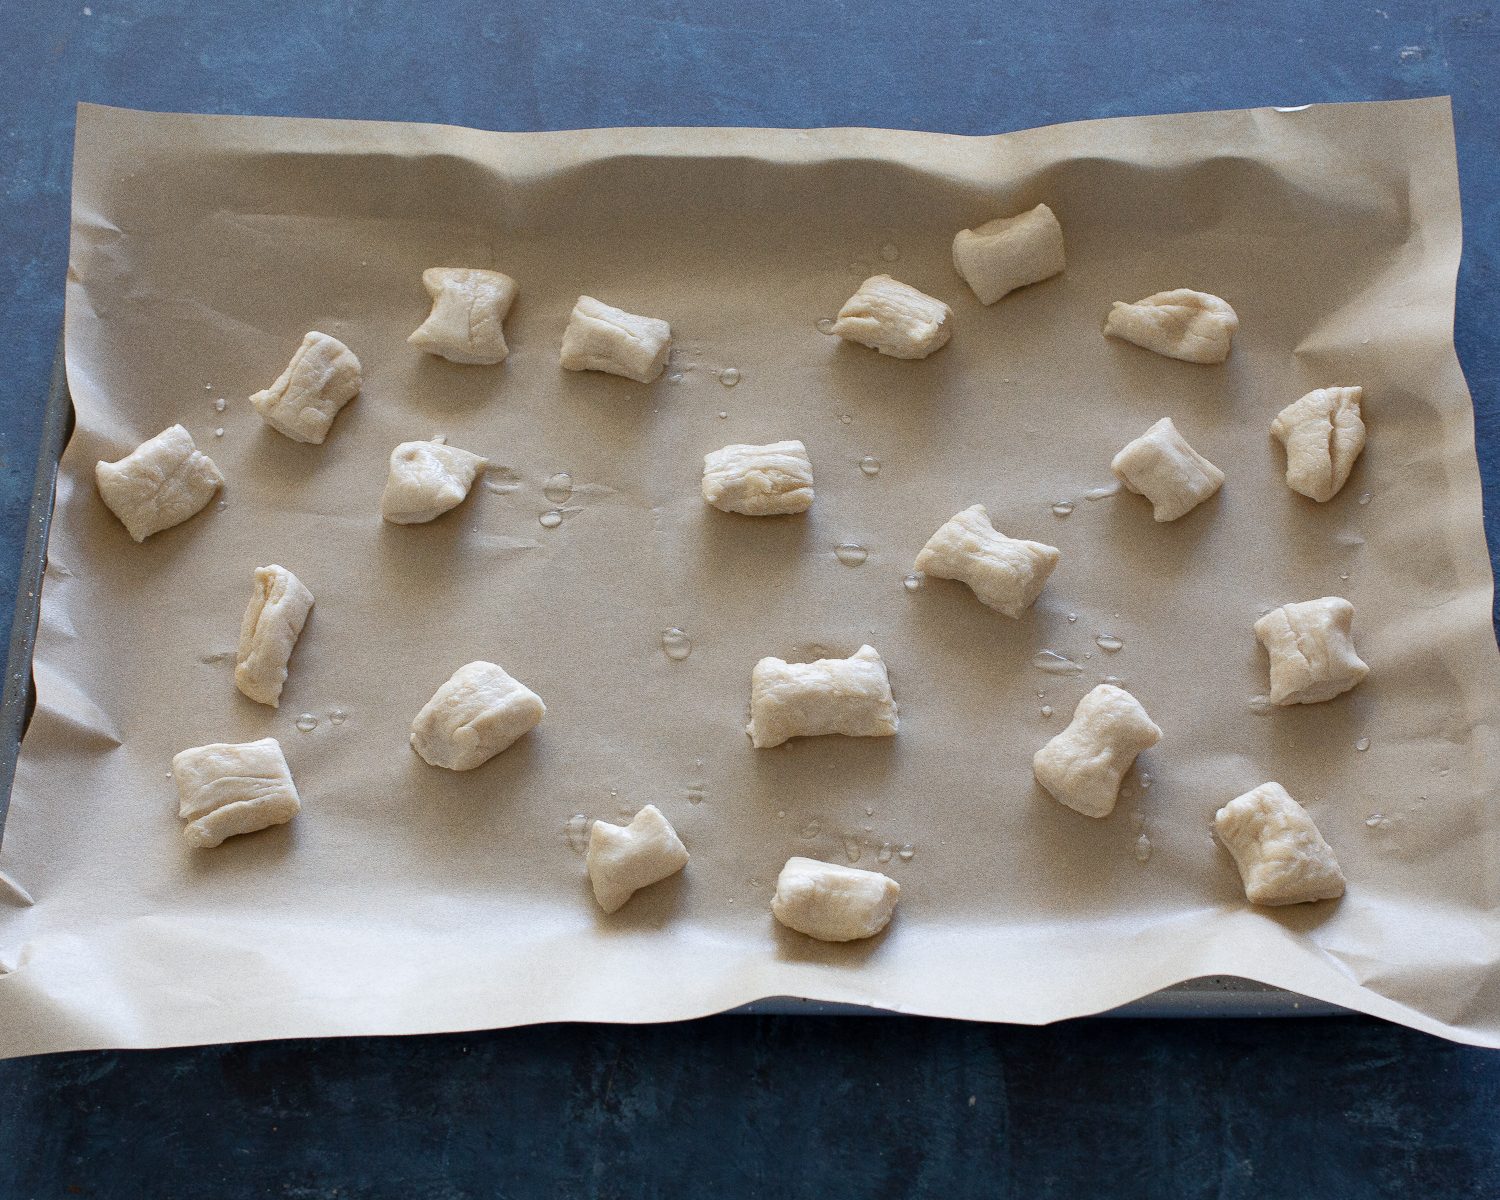
Step 3: Crafting the Classic Shape (or Not)
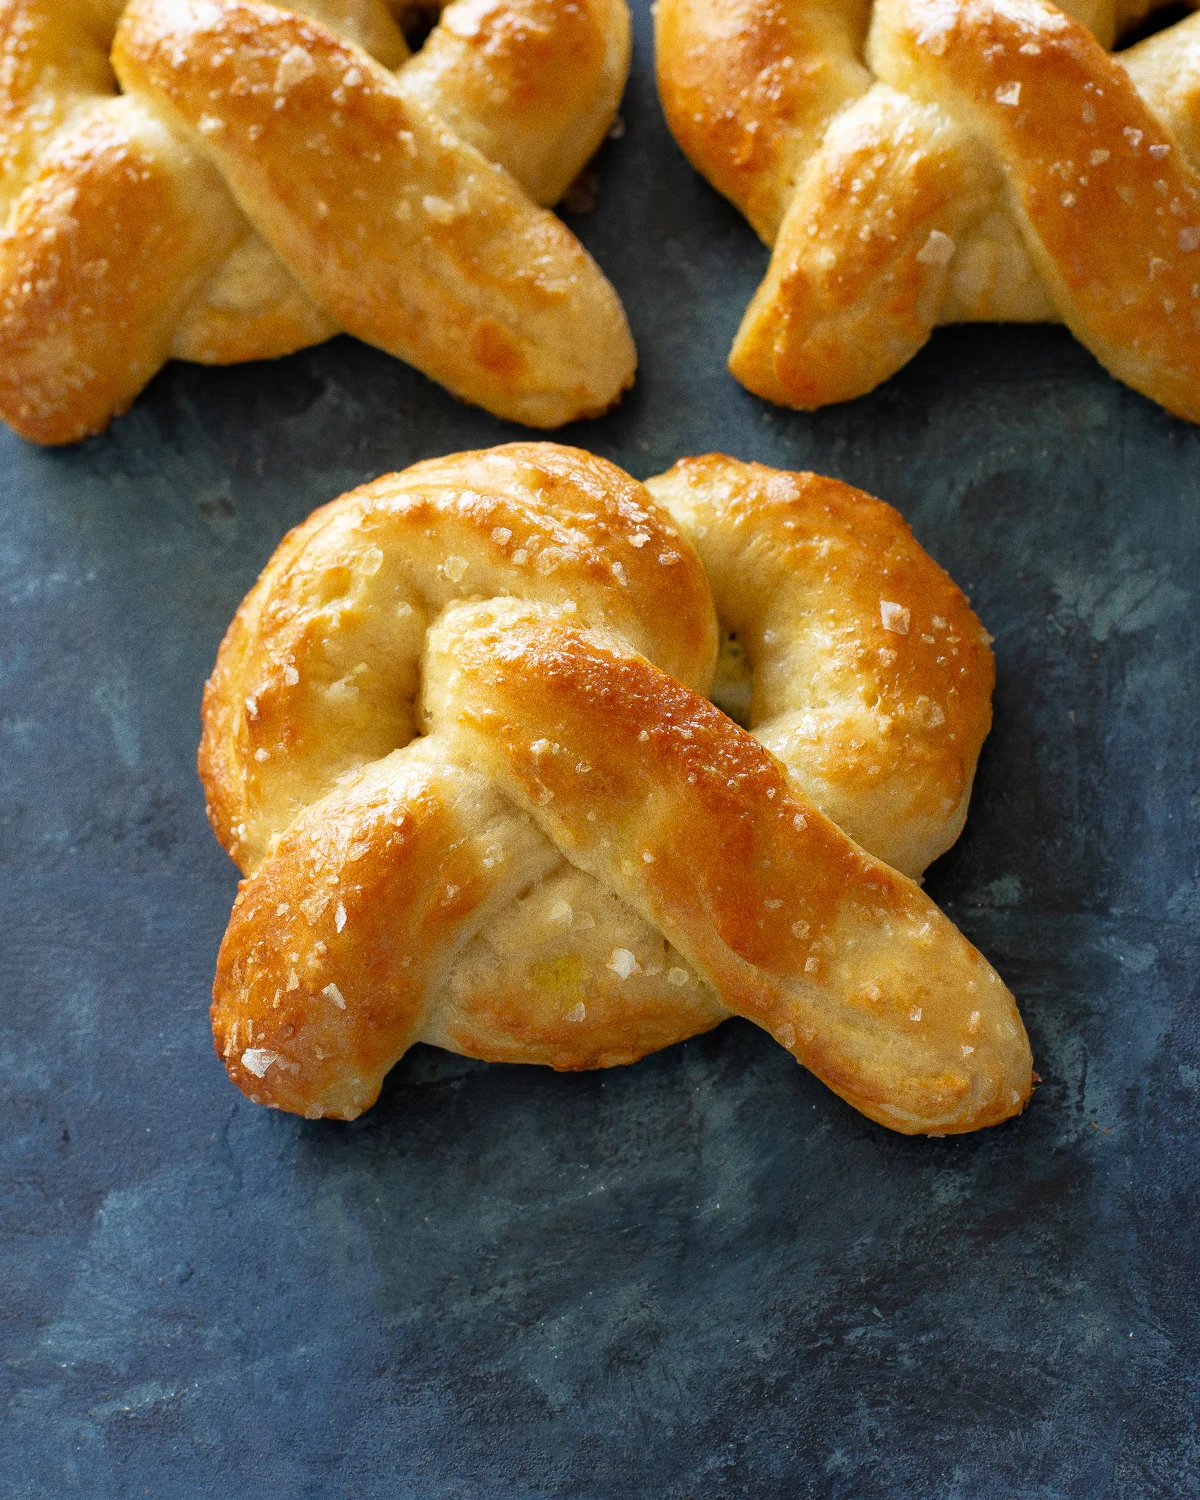
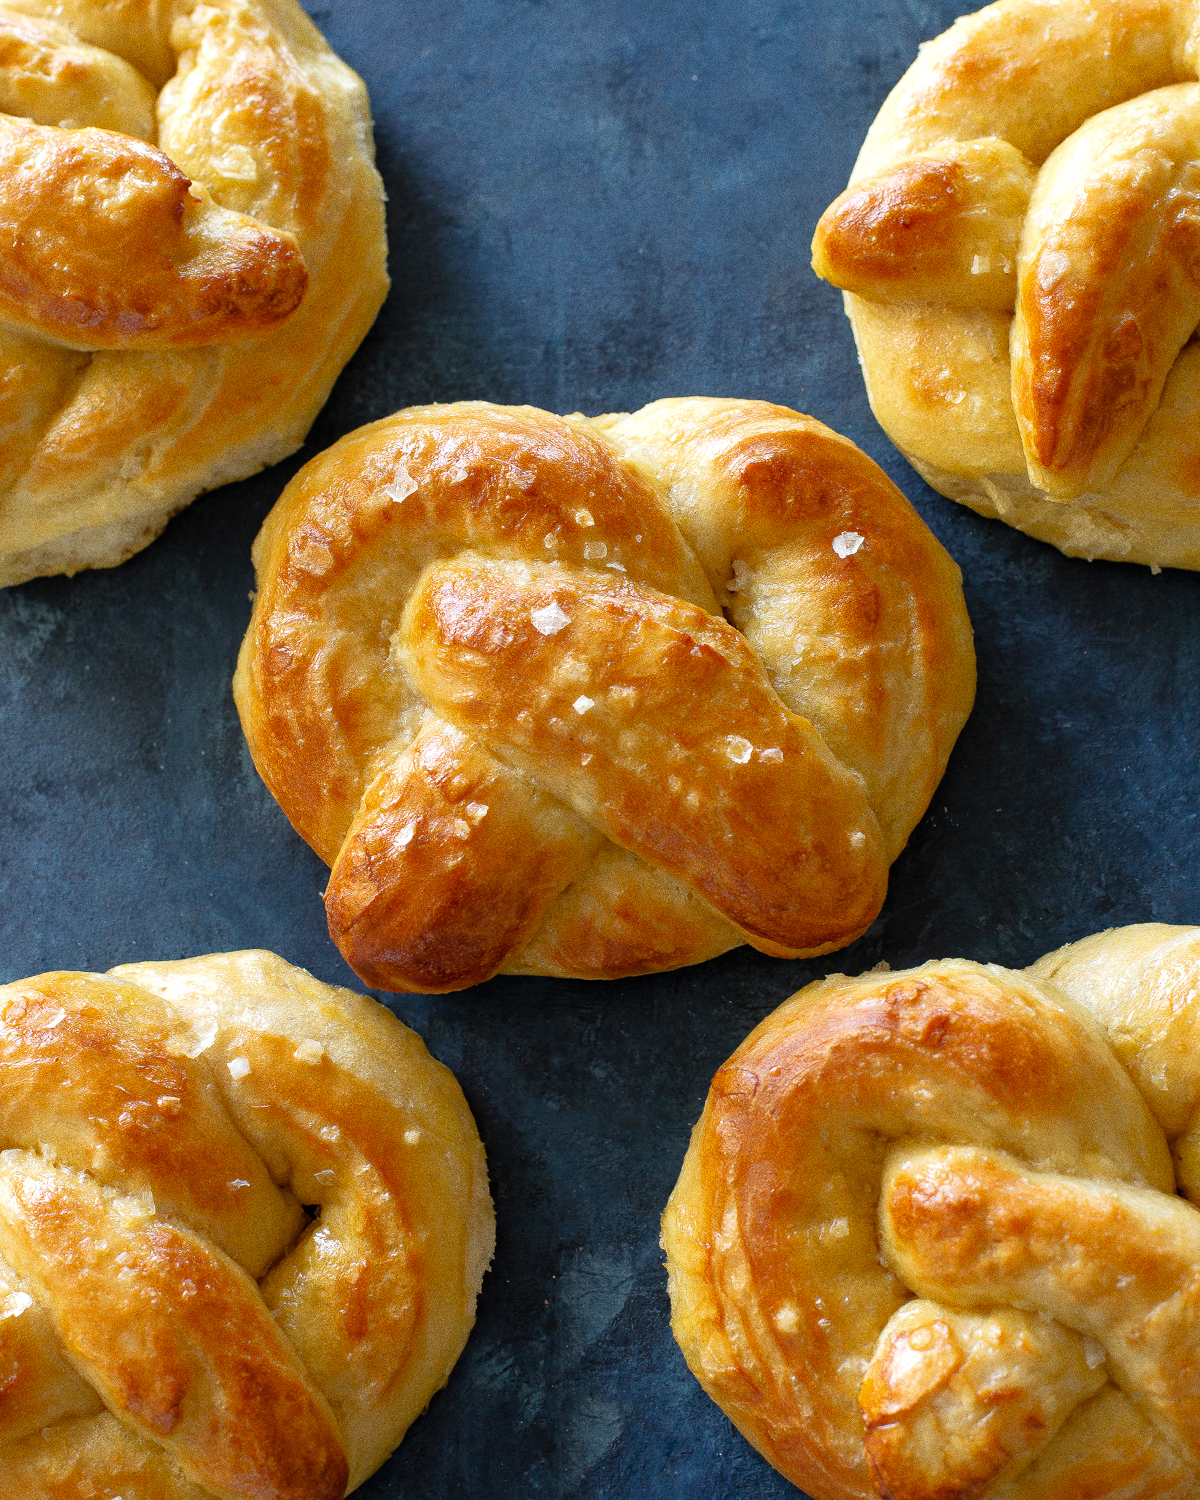
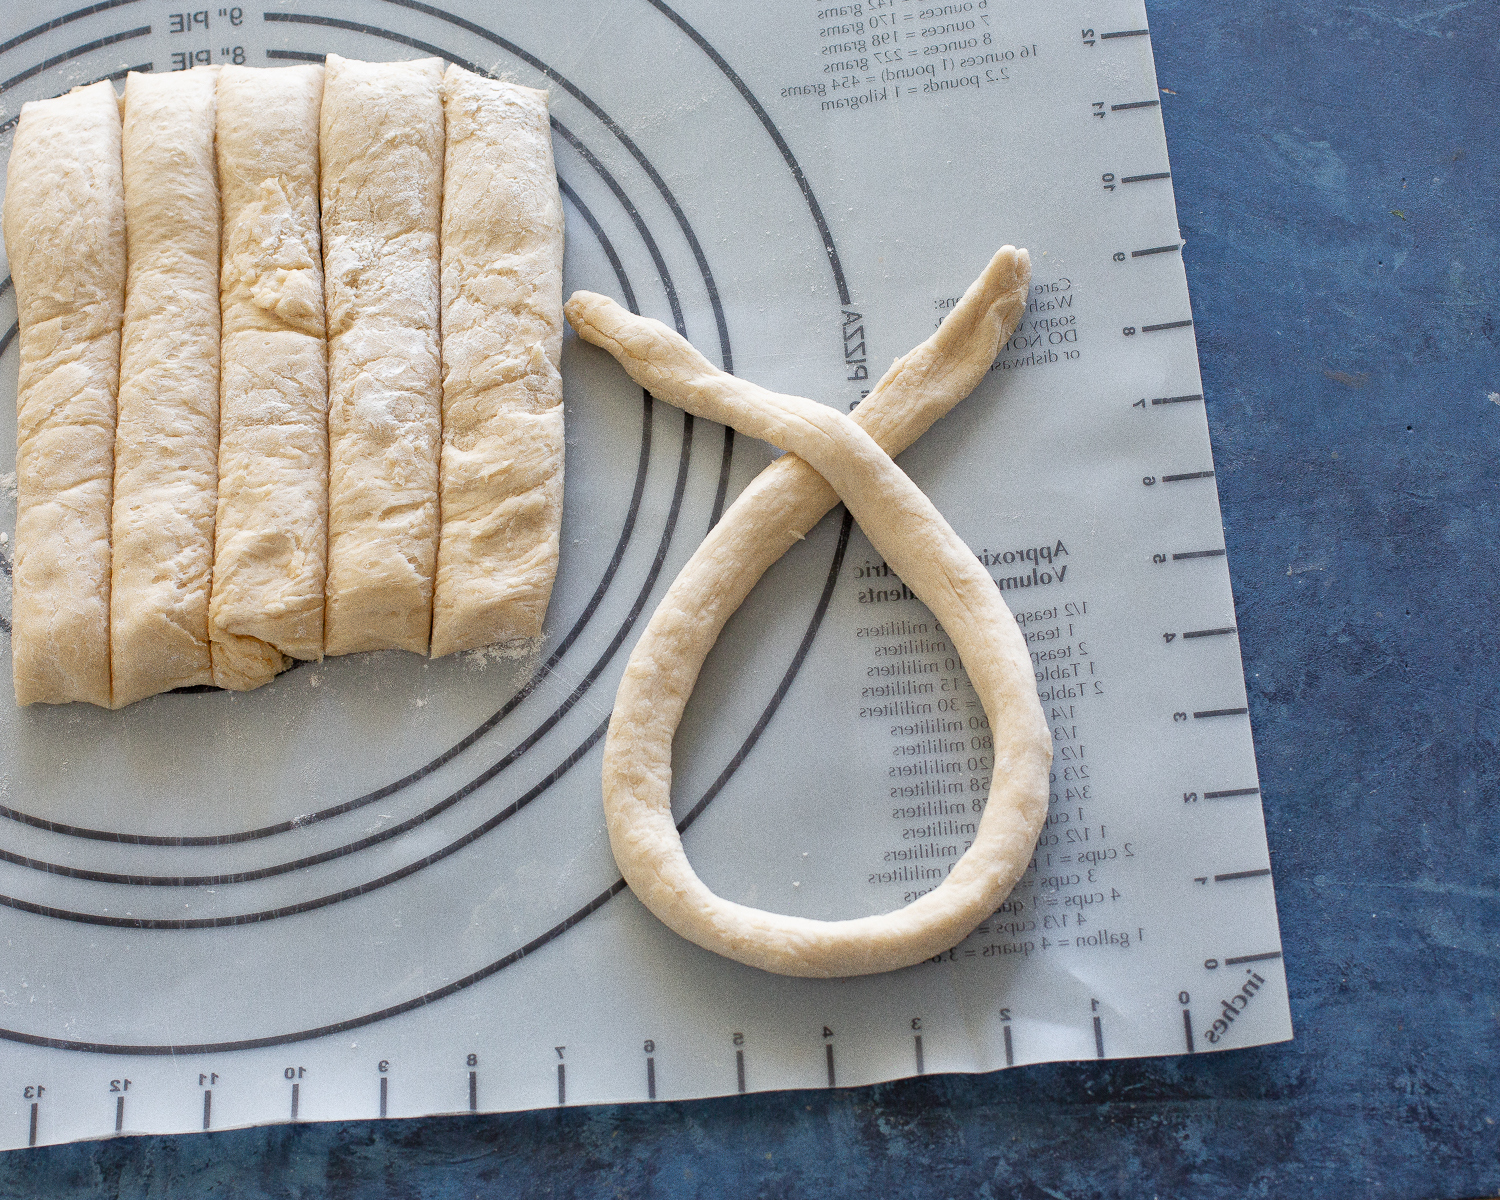
Once the dough has rested, it’s time to divide it into equal portions. Each portion is then rolled into a rope, the thickness of which will influence the final pretzel’s chewiness – thicker ropes generally result in a chewier pretzel. The traditional pretzel shape, with its distinctive loops and twists, is iconic. However, the beauty of homemade pretzels lies in their versatility. Whether formed into classic knots, fun bites, or even simple logs, the fundamental flavor and texture remain. The author notes that the shape itself doesn’t fundamentally alter the taste, encouraging experimentation and creativity.
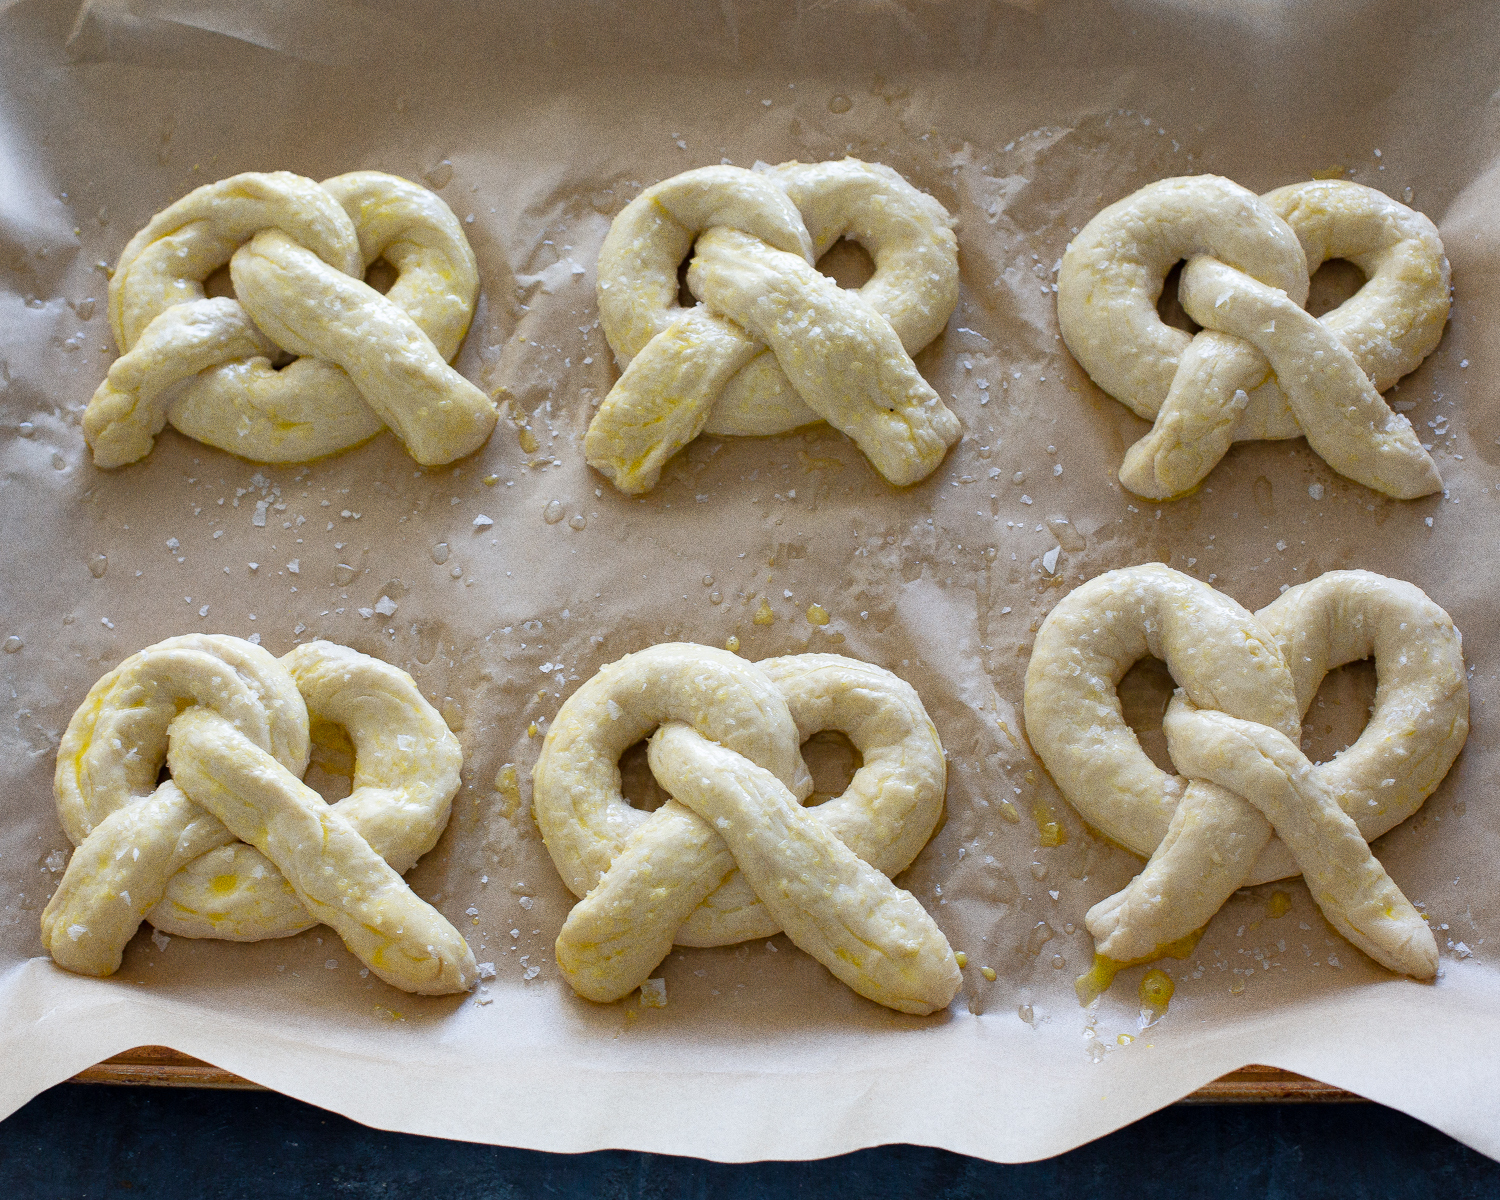
Step 4: The Alkaline Bath for Ultimate Chew
This is the defining step. The shaped pretzels are gently submerged, one by one, into a simmering solution of water and baking soda for 15-30 seconds. This brief immersion is the secret to achieving that coveted chewy texture. The pretzels are then carefully removed and placed on a baking sheet lined with parchment paper. This step might seem intimidating, but it’s a straightforward process that yields remarkable results.
Step 5: Baking to Golden Perfection
Before baking, the pretzels are brushed with an egg wash. This not only imparts a beautiful golden sheen but also serves as an adhesive for the generously sprinkled coarse salt. The pretzels are then baked in a preheated oven until they achieve a rich, golden-brown hue. The baking time will vary depending on the size and thickness of the pretzels, but typically ranges from 10-15 minutes. The aroma filling the kitchen at this stage is a true testament to the success of the baking process.
Beyond the Bake: Enhancing the Pretzel Experience
While the pretzel itself is a star, the accompaniments can elevate it further.
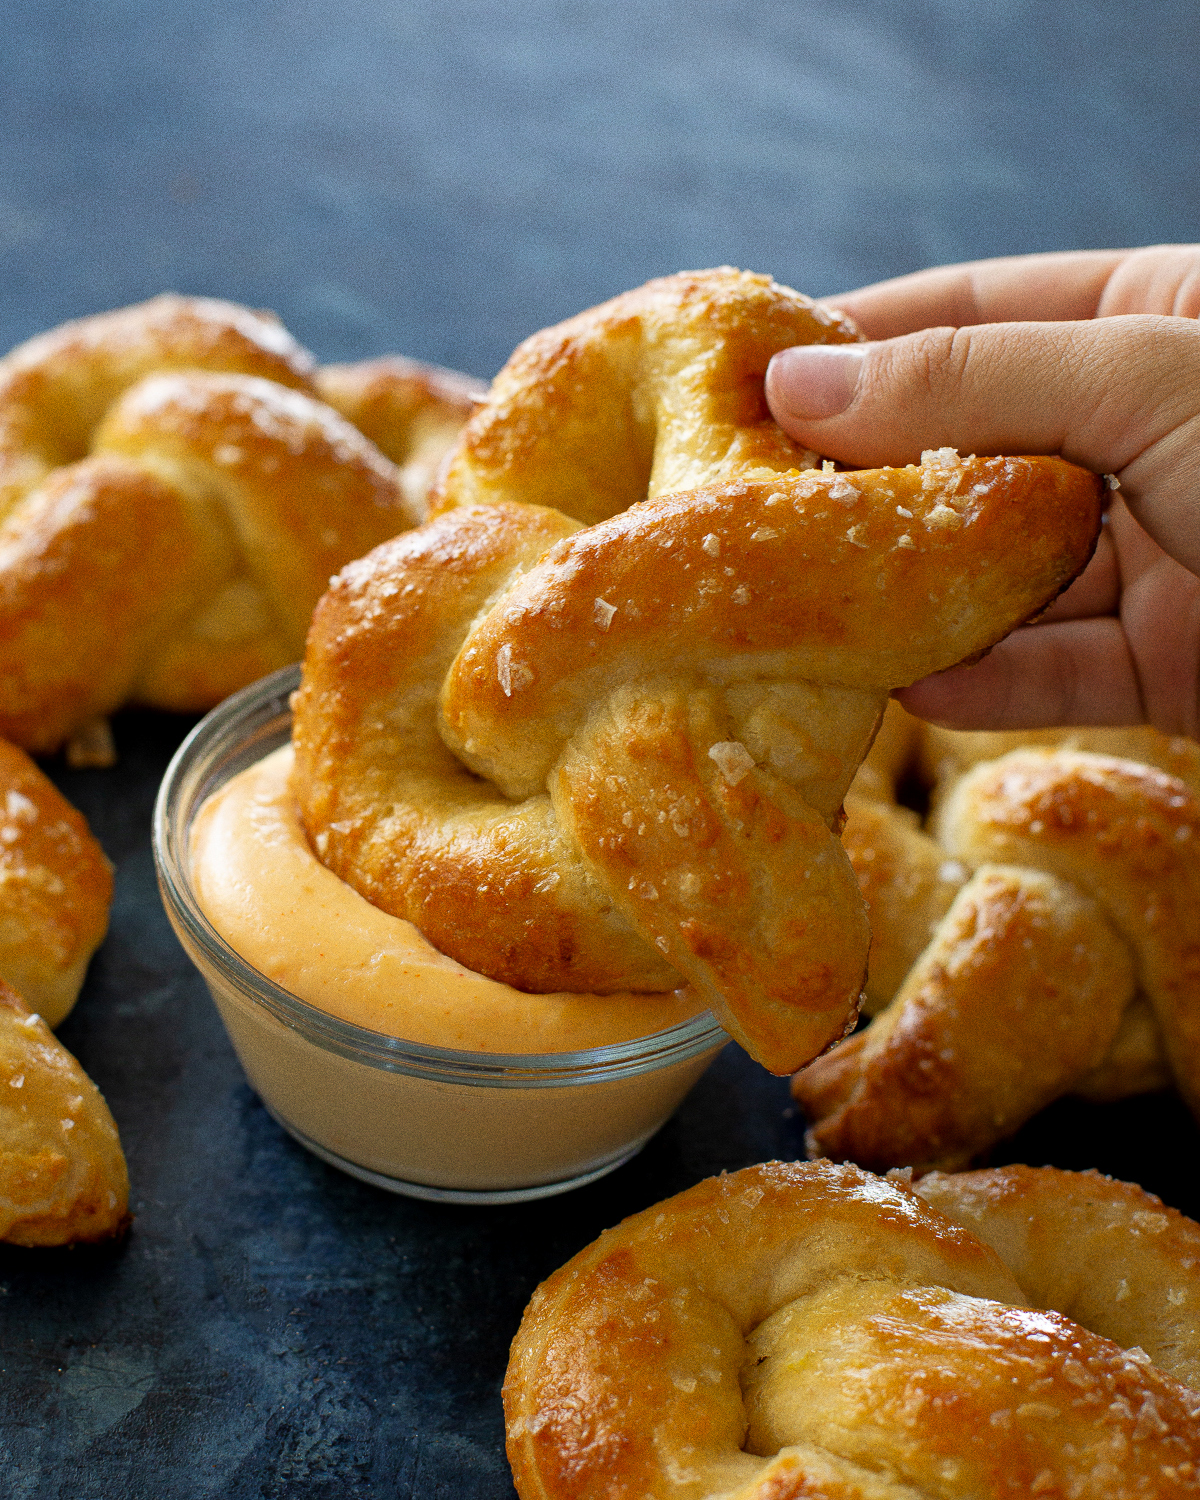
Dipping Sauce Ideas
The author rightly points out that the dip is often "half the experience." Classic pairings include:
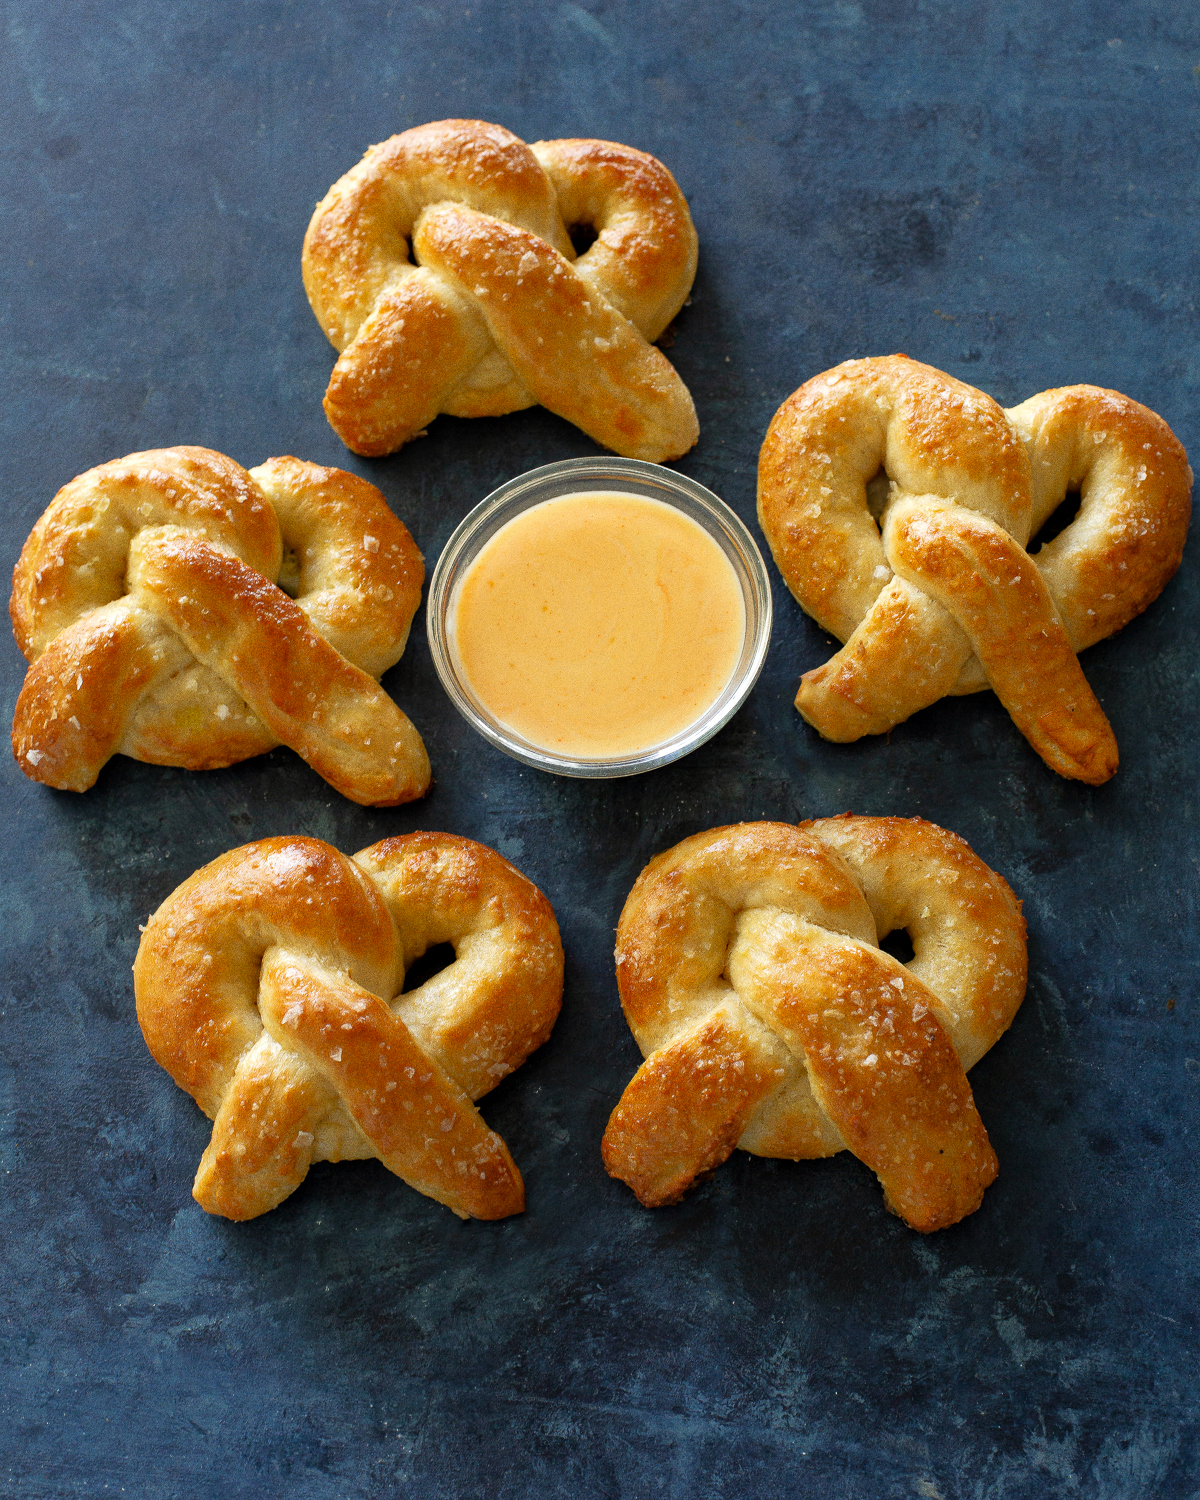
- Cheese Sauce: A warm, gooey cheese sauce is a perennial favorite, offering a rich and savory counterpoint to the salty pretzel.
- Mustard: A variety of mustards, from sharp Dijon to sweet honey mustard, provide a tangy and zesty dimension.
- Melted Butter: For those who prefer simplicity, a generous serving of melted butter is a comforting and delicious option.
Tips for Consistent Success
To ensure consistently excellent soft pretzels, consider these expert tips:
- Don’t Over-Flour: Resist the temptation to add too much flour during kneading, as this will result in a dry, dense pretzel.
- Mind the Rise: Avoid over-proofing the dough. A shorter rise time contributes to a chewier texture.
- The Bath is Key: Ensure the baking soda bath is at the correct temperature and that each pretzel is submerged for the recommended duration.
- Fresh Ingredients: Use fresh yeast for optimal leavening.
- Experiment with Shapes: Don’t be afraid to get creative with the shaping.
The Enduring Appeal of Homemade
The process of making soft pretzels at home offers a rewarding culinary experience. It’s a tangible demonstration of how simple ingredients and a few key techniques can transform into something truly special. The ability to control the quality of ingredients, the level of saltiness, and the precise chewiness makes homemade pretzels a superior choice for many. Furthermore, the joy of sharing these warm, freshly baked treats with family and friends adds an intangible layer of satisfaction. The author’s dedication to perfecting this recipe, involving numerous iterations, underscores the commitment required to achieve a truly outstanding result. The comparison to mall favorites serves not as a discouragement, but as a benchmark that highlights the achievable excellence of home baking.
The enduring popularity of the soft pretzel, from its humble beginnings to its status as a global snack icon, is a testament to its simple yet profound appeal. By understanding the science behind its texture and embracing the straightforward steps of its preparation, any home cook can master the art of the perfect soft pretzel, creating a treat that is both delicious and deeply satisfying. The journey from basic pantry staples to a warm, chewy, and perfectly salted pretzel is a culinary adventure well worth embarking on.
